Removing and replacing a concrete driveway in San Diego, CA, involves more than just breaking up old pavement and pouring new concrete.
The process involves careful preparation, adequate equipment, and understanding the unique weather conditions that can impact the job.
Whether you are dealing with cracks or drainage issues or simply want to update the appearance of your property, knowing the steps involved guarantees a desirable outcome.
This article will guide you through the essential phases of replacing your concrete driveway, which is unique to San Diego’s environment.

Concrete replacement in San Diego, CA
1. Assess the Driveway’s Condition
A complete analysis is necessary prior to removal and replacement to uncover underlying concerns such as soil instability, drainage difficulties, or structural damage. A rigorous inspection guarantees the new driveway is built on a strong foundation, avoiding future issues and costly repairs. Addressing any existing issues can increase the durability and performance of your new driveway, making it a good investment.
2. Obtain Required Permits
The relevant permits ensure compliance with local legislation and prevent potential fines. They certify that the project meets safety standards, preserves public infrastructure, and adheres to local planning rules. Furthermore, having the necessary permissions protects property value and guarantees that the local authorities approve the work, offering peace of mind.
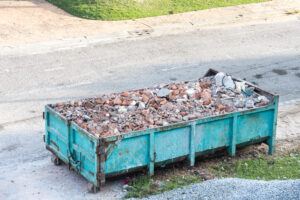
3. Demolish the Old Driveway
Once the area has been secured, specialized equipment, often jackhammers or hydraulic breakers, breaks the concrete into manageable sections. The trash is then placed onto dump trucks and sent to a nearby landfill or recycling facility. In certain circumstances, fractured concrete may be recycled for future construction projects. The entire procedure needs meticulous preparation and execution to ensure safety and minimal interruption to the surroundings.
5. Prepare the Base
A firm and well-prepared base is critical to the lifetime and durability of fresh concrete. Dig the driveway to at least 4 inches below the desired final grade. It is crucial to eliminate debris or other impediments that might jeopardize the base’s stability. Fill any low locations with an appropriate base material, such as crushed stone or gravel. To achieve adequate density and stability, firmly compress the foundation using a heavy roller.
6. Forms Installation and Replacement
Forms act as temporary constraints that shape the new surface of the concrete. They are often fixed to prevent the mixture from spreading outside the designated area and are composed of steel or wood. They are then removed so you can see the freshly built driveway once the concrete has solidified. The material and installation technique will be determined by the driveway’s size and intricacy, as well as the project’s unique needs. Proper form installation and removal are required to create a smooth, level, and long-lasting concrete driveway.
7. Pour the New Concrete
The wet concrete is usually brought in a mixer truck and poured straight into the prepared molds. As the concrete is poured, it is meticulously distributed and smoothed with shovels, rakes, and screeds. Concrete is frequently compressed with a vibrating machine to guarantee a solid and sturdy foundation to eliminate air pockets. To achieve maximum strength and durability, concrete must be allowed to cure for a specific amount, usually several days after it has been poured and completed. During this period, preserving the concrete from harsh weather and foot activity is critical.
8. Curing
This is a crucial step in guaranteeing the strength and longevity of freshly poured concrete. After removing and repairing your driveway, keep it damp to allow the concrete to solidify correctly. This can be accomplished by covering the surface with plastic sheeting or burlap, which prevents moisture loss by evaporation. Alternatively, a curing chemical can create a protective coating that holds moisture. Regular spraying or sprinkling of water on the fresh surface might also help to maintain proper moisture levels. This curing phase usually takes several days, allowing the concrete to reach its maximum strength and resistance to breaking before you can apply a sealant.
Removing and repairing a concrete driveway is a significant operation that demands meticulous planning and execution. While it may appear overwhelming, with proper planning, supplies, and methods, it can be a great DIY project. Throughout the process, remember to emphasize safety and consider obtaining expert help if you have any questions or concerns. Professionals also have specialized equipment and experience to handle the most challenging tasks.